How to Screenshot on Mac
Whether you want to capture a screenshot of your Mac computer’s screen or want to take a picture of a webpage or application, there are a few different methods you can use to get the results you want. Some of the best tools include the OS X screenshot command, the screenshot command in AppleScript, and a screenshot app for Mac. Let’s check how to screenshot on mac.
Table of Contents
Retina displays allow you to create high-resolution screenshots
Taking high resolution screenshots on a Mac is easy with a few simple tricks. The screenshot image is used to capture desktop activity and troubleshoot software issues. The quality of the screenshot will depend on the resolution of the display.
Screens with a Retina display typically have four times more pixels than traditional displays. This means that a screenshot will be sharper and richer. The same applies to websites and landing pages. However, a Retina display will also have fuzzy edges on images.
Retina displays are found in MacBooks and iMacs. Apple has registered the word “Retina” as a trademark for computers and mobile devices. The company has been actively researching technologies that can improve performance on high resolution displays.
If your device doesn’t have a Retina display, there are ways to increase your screenshot resolution. For example, you can use a plugin or custom emulated device to improve your screenshot. The quality of your screenshots will depend on the number of pixels per square inch (PPI). You can also increase the size of your screenshot by making the text larger.
When taking a screenshot, it’s important to use a pixel ratio of 1:1. This means that you should capture the entire screen or a window in a single screenshot. You should not use a screenshot app that uses a pixel ratio of less than one.
Customize the keys used for screenshots
Using keyboard shortcuts for screenshots on macOS is easy. Whether you’re a Mac veteran or a new user, there are a few different ways to get started. Some apps will let you specify a screenshot location, and others will not. Depending on which one you choose, you can also change the way your screenshots behave.
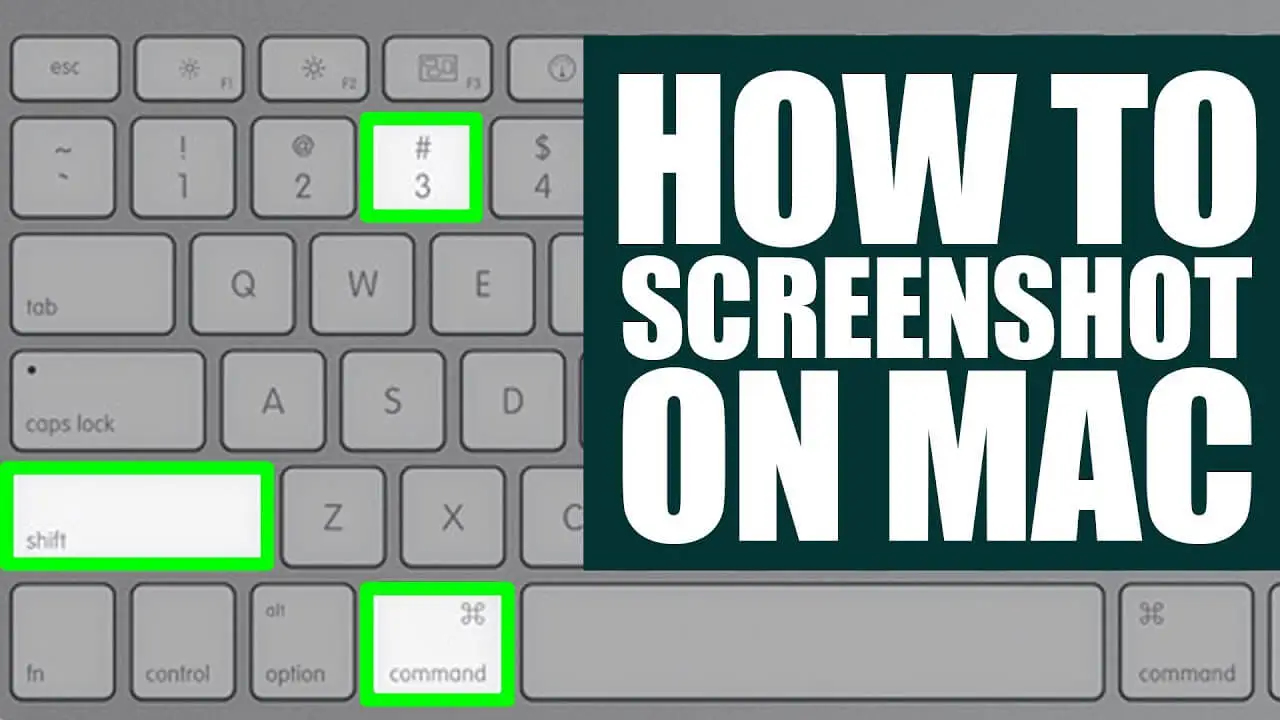
If you’re looking to take a screenshot of the entire screen, you can press Cmd+Shift+5. You can also hold Shift to capture a portion of the screen or window. If you’re interested in changing the size of the selected area, you can press Option to resize it. If you’re interested in saving your screenshot in a different format, you can press Command+Shift+4.
The screenshot menu is also a great way to capture a screenshot. When you have a screenshot ready, you can click the thumbnail to see a quick preview. You can then edit the screenshot using the Screenshot menu.
If you’re looking to save your screenshots, you can try copying and pasting them into another app. You can also paste the screenshot into Terminal, which you can access from Applications>Utilities. You can then use Terminal commands to save the screenshot in the desired format.
The screen capture features on macOS are excellent. There’s a menu of tools you can use to capture the screen, record clicks, and control the pointer. You can also add a screenshot to your toolbar or menu bar. You can also save your screenshots to your desktop.
Restart and update the Mac
Getting a screenshot on your Mac can be a great way to share what you see on your screen. However, not all apps or websites are willing to let you do it. This can cause issues that prevent your Mac from functioning properly. But the good news is that there are ways to fix these problems.
First, check to see whether your screenshot shortcuts are active. If they are, you will be able to take a screenshot without any problem. If they are not, you may need to downgrade or restart your Mac.
Next, try to take a screenshot using the Screenshot app. You will need to hold down the Shift key while pressing the power key. You will then need to release the keys after the Apple logo appears. You will then see a popup window with a “restart” option.
Next, check to see if your Mac has any other updates. If it does, install them. This will fix most issues. If not, you may need to restart and update the Mac to fix the problem.
If you are still having problems with your Mac, you can try to restart it and re-download the software. If you are unsure about whether you can restart the Mac, you can try restarting in Safe Mode. This will allow you to fix some of the problems without having to wipe the hard drive.